


You sent photos from your iPhone to your computer, and they won’t open. Or a website refuses to accept your upload. The file ends in .HEIC — and that’s the problem.
This guide explains what HEIC is, why it causes trouble outside of Apple devices, and how to convert HEIC photos to JPEG or PNG in bulk with the free HEIC Converter — right in your browser, without uploading your photos anywhere.
I ran into this myself when moving iPhone photos to a Windows PC. Most online converters upload your photos to their servers, so I built one that keeps them on your device.
What is HEIC?
HEIC (High Efficiency Image Container) is the photo format iPhones have used by default since 2017. It keeps image quality high while making files roughly half the size of a comparable JPEG, which saves a lot of storage.
The catch is compatibility. Apple devices open HEIC without a second thought, but many other places don’t:
- Windows often needs an extra extension from the Microsoft Store to view HEIC files
- Many websites, online forms, and older apps only accept JPEG or PNG
- Some photo editors and office software can’t import HEIC at all
Converting to JPEG (or PNG) makes your photos work almost everywhere.
What this tool does
- Converts HEIC photos to JPEG or PNG
- Handles many photos at once, with a single ZIP download
- Lets you adjust JPEG quality
- Works entirely in your browser — your photos are never uploaded
How to use it
Step 1. Open the tool
Open the HEIC Converter. The first time, the conversion engine loads in the background, which can take a few seconds.

Step 2. Select your photos
Choose the HEIC files you want to convert — you can select as many as you like. Then pick the output format. JPEG is the best choice for photos; the default quality works well for most uses.
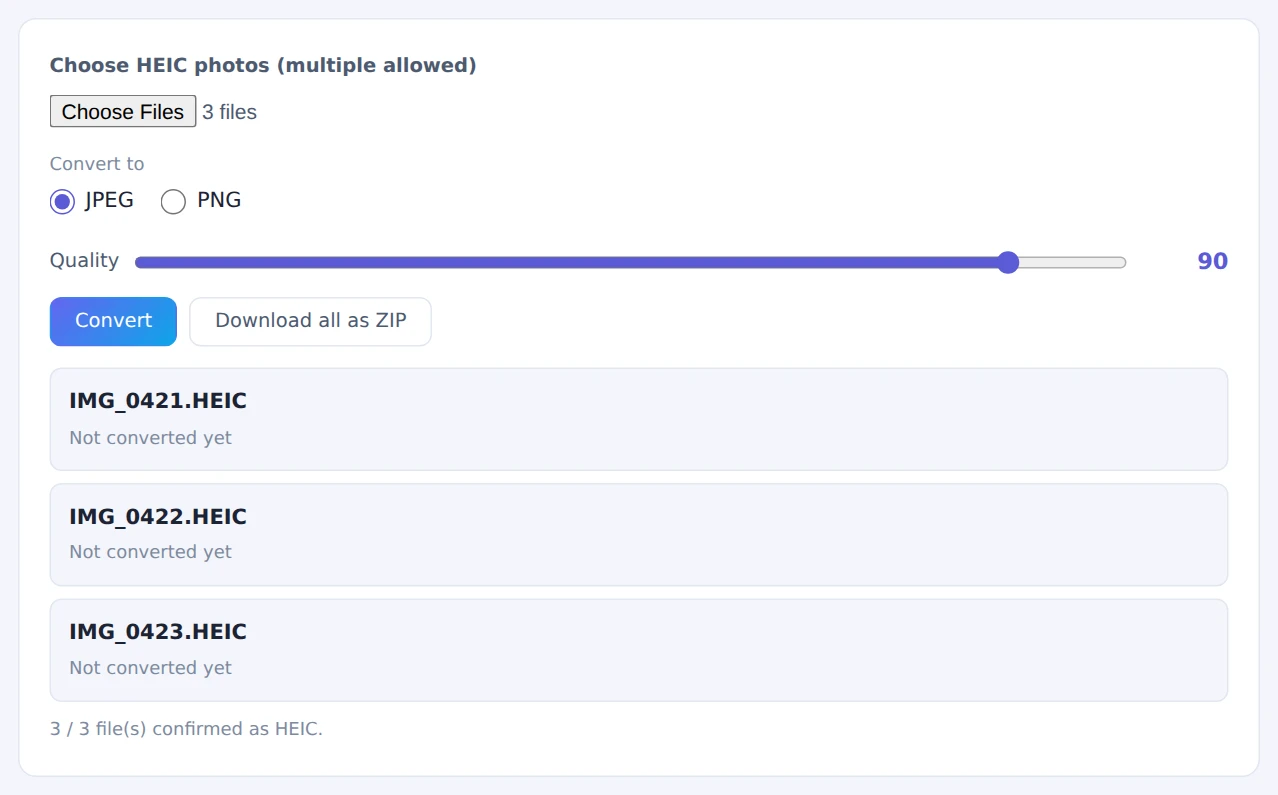
JPEG at the default quality works well for most photos
Step 3. Convert
Click Convert. Each photo appears with a thumbnail and its new file size when it’s done.
Step 4. Save the results
Save photos one by one with each Save button, or click Download all as ZIP to get everything in one file.

For photos, stick with JPEG. PNG is lossless, but for camera photos the files can end up around ten times larger than the original HEIC.
When this comes in handy
- Opening iPhone photos on Windows: convert them once and they open in any photo viewer
- Uploading to websites and forms: many upload fields only accept JPEG or PNG
- Sharing with non-Apple users: send files that open on any device
- Using photos in documents: insert them into Word, PowerPoint, or Google Docs without errors
FAQ
Can I stop my iPhone from saving HEIC in the first place?
Yes. Go to Settings → Camera → Formats and choose Most Compatible. New photos will be saved as JPEG. Keep in mind that JPEG files take up more storage, and photos you’ve already taken stay in HEIC.
Doesn’t the iPhone convert photos automatically when I share them?
Often, yes — when you share through Mail, Messages, or AirDrop to a non-Apple device, iOS may convert to JPEG on its own. But copying photos over a USB cable, syncing through some cloud services, or exporting “original” files can leave them in HEIC. That’s when a converter helps.
Will converting reduce the quality?
At the default JPEG quality, the difference is hard to see. If you need the highest possible quality for editing or printing, raise the quality setting or choose PNG.
Things to watch out for
- Location data: photos taken with location services on may contain GPS coordinates. If you’re sharing photos publicly, check them with the EXIF Viewer & Remover first
- Live Photos: only the still image is converted — the motion part isn’t included
- Very large batches: converting hundreds of photos at once uses a lot of memory. On a phone, work in smaller batches
Summary
HEIC saves space on your iPhone, but it doesn’t open everywhere. Converting to JPEG solves the compatibility problem, and with this tool you can do it in bulk without uploading your photos.
Try it with a few photos the next time an iPhone image refuses to open.

